QuickBooks Online Data Migration Guides
How to disable QuickBooks auto apply credits/bill payments?
Before you start migrating your accounting data to QuickBooks Online, it's important to disable any automations to prevent unwanted changes during the transfer. Follow these steps to ensure QuickBooks does not apply automatic adjustments to your migrated data.
You need to turn off such QuickBooks Online automation as:
- Automatically apply credits
- Automatically apply bill payments

Follow this guide to switch off automation in QuickBooks Online:
1. Go to your QuickBooks Online account.
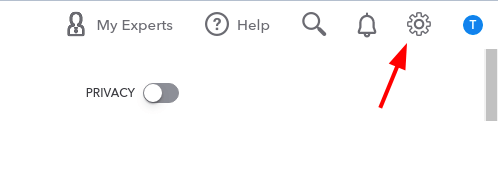
2. Click on the Setting icon.
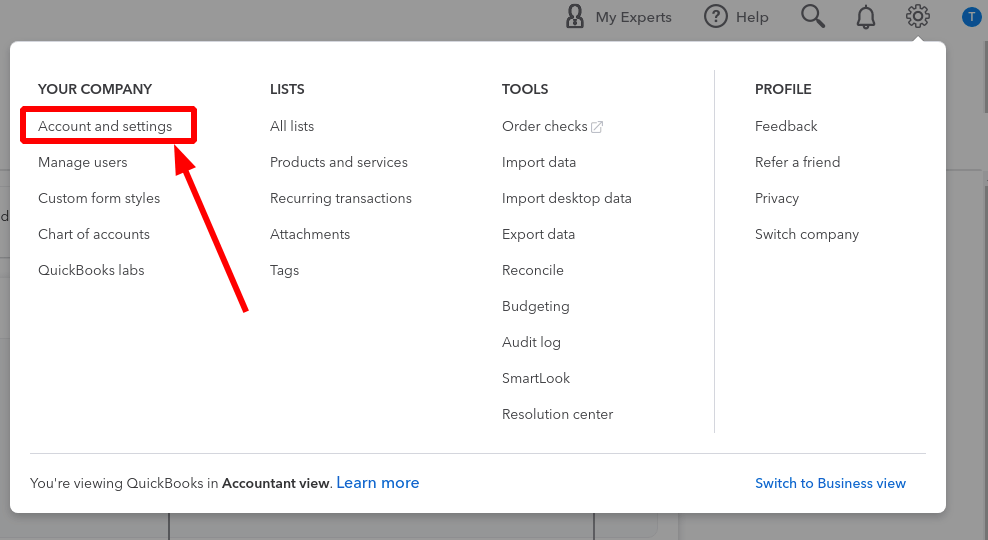
3. Under Your Company, select Account and settings.
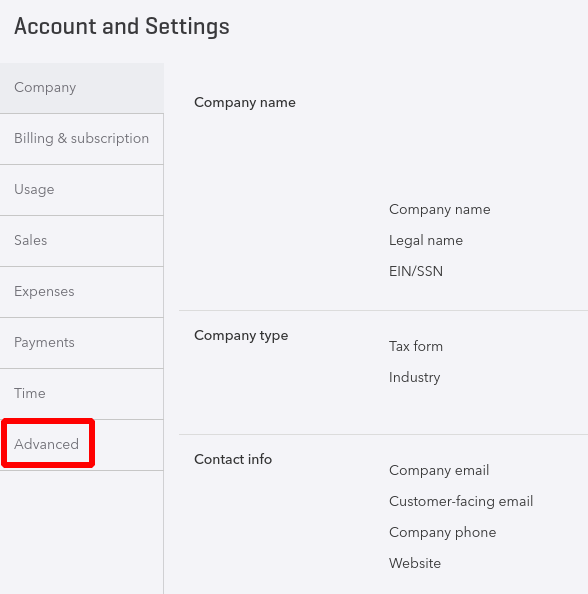
4. Choose Advanced on the left sidebar.
5. Scroll down to Automation and click the Edit icon.
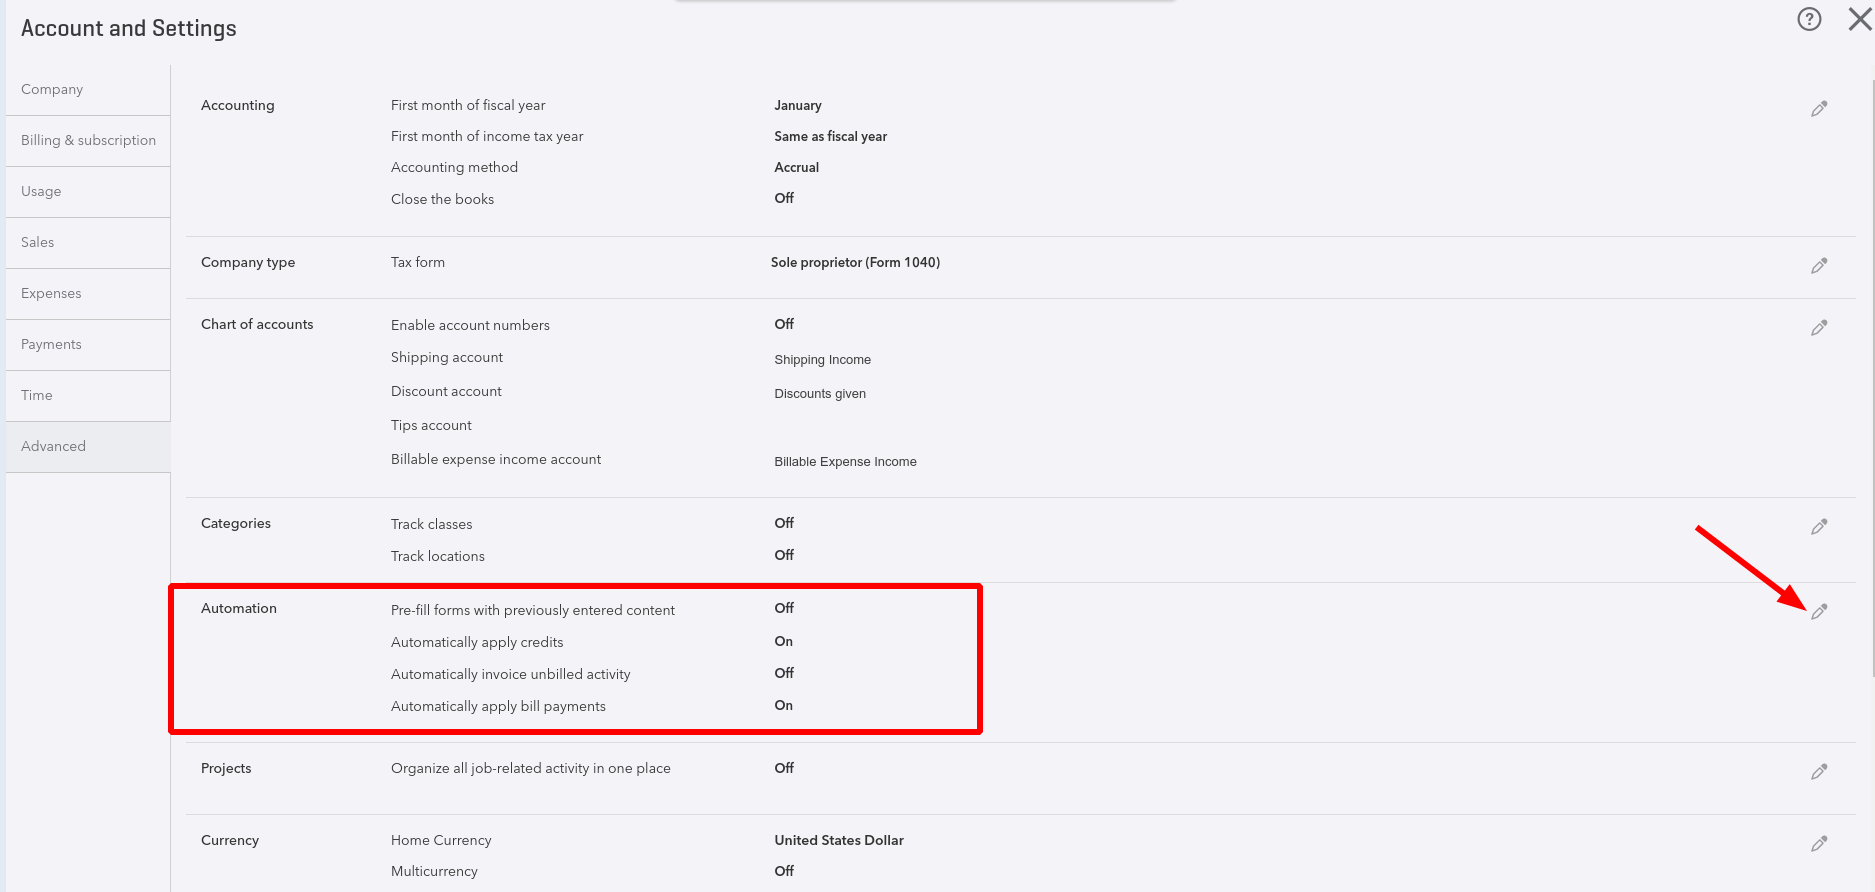
6. Turn off automation for “Automatically apply credits” and “Automatically apply bill payments”.

7. Click Save to apply the changes.
8. Verify that automations are turned off.

By following these steps, you'll ensure a smooth data migration process to QuickBooks Online.
How to create a payment account in QuickBooks Online?
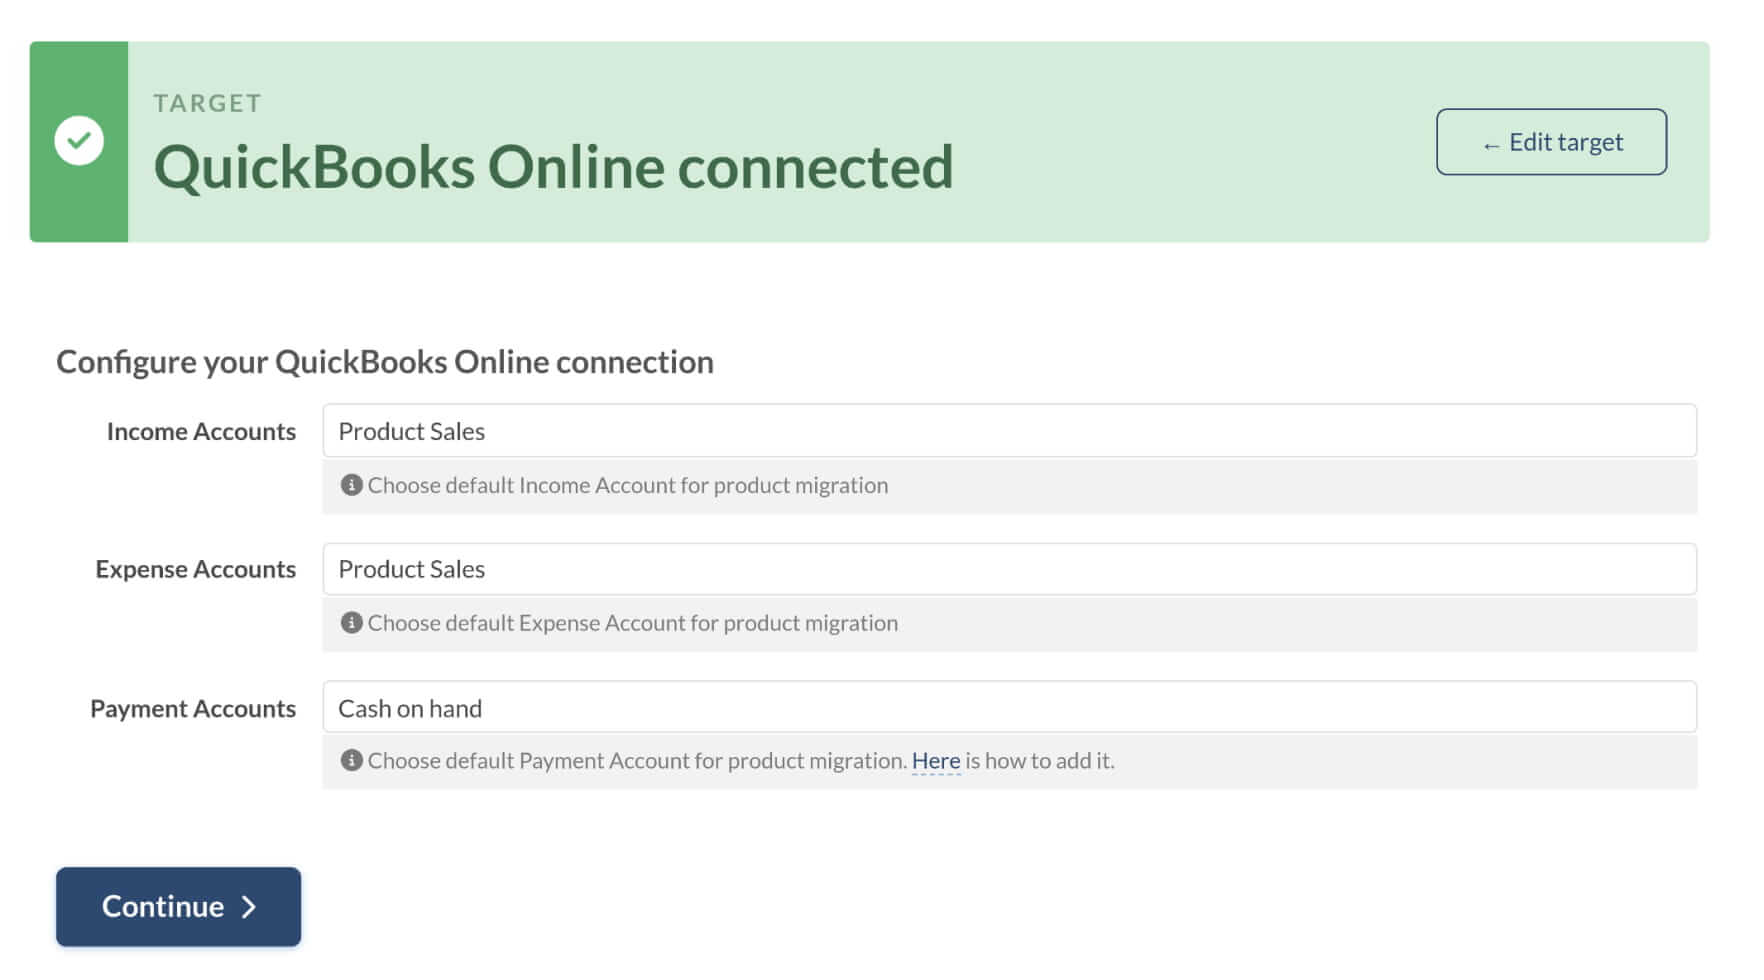
To ensure a smooth migration to QuickBooks Online, you need to set up your payment accounts correctly. If you don't have a payment account with the type "Bank," you won't be able to connect QuickBooks Online as your target platform. Configure your connection by choosing:
- Income accounts
- Expense accounts
- Payment accounts
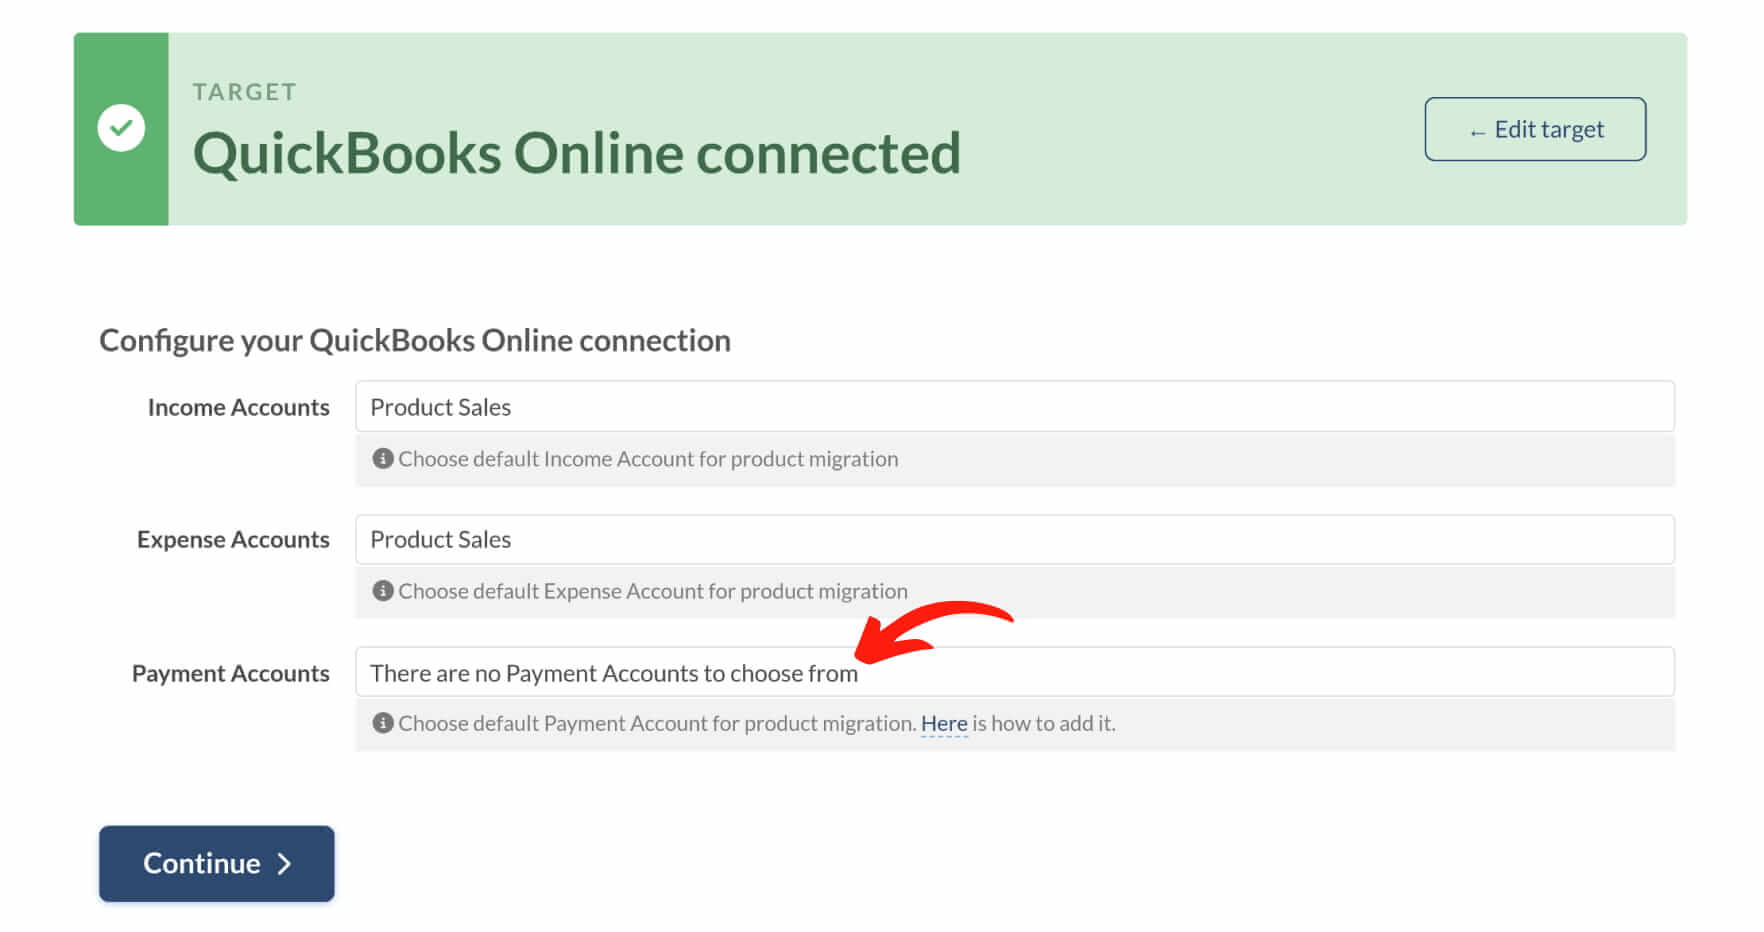
Here’s a step-by-step guide to creating a payment account in QuickBooks Online:
1. Go to your QuickBooks Online account.
2. Click at the Settings icon in the right-top corner.
3. In the Settings window, switch to Account view.
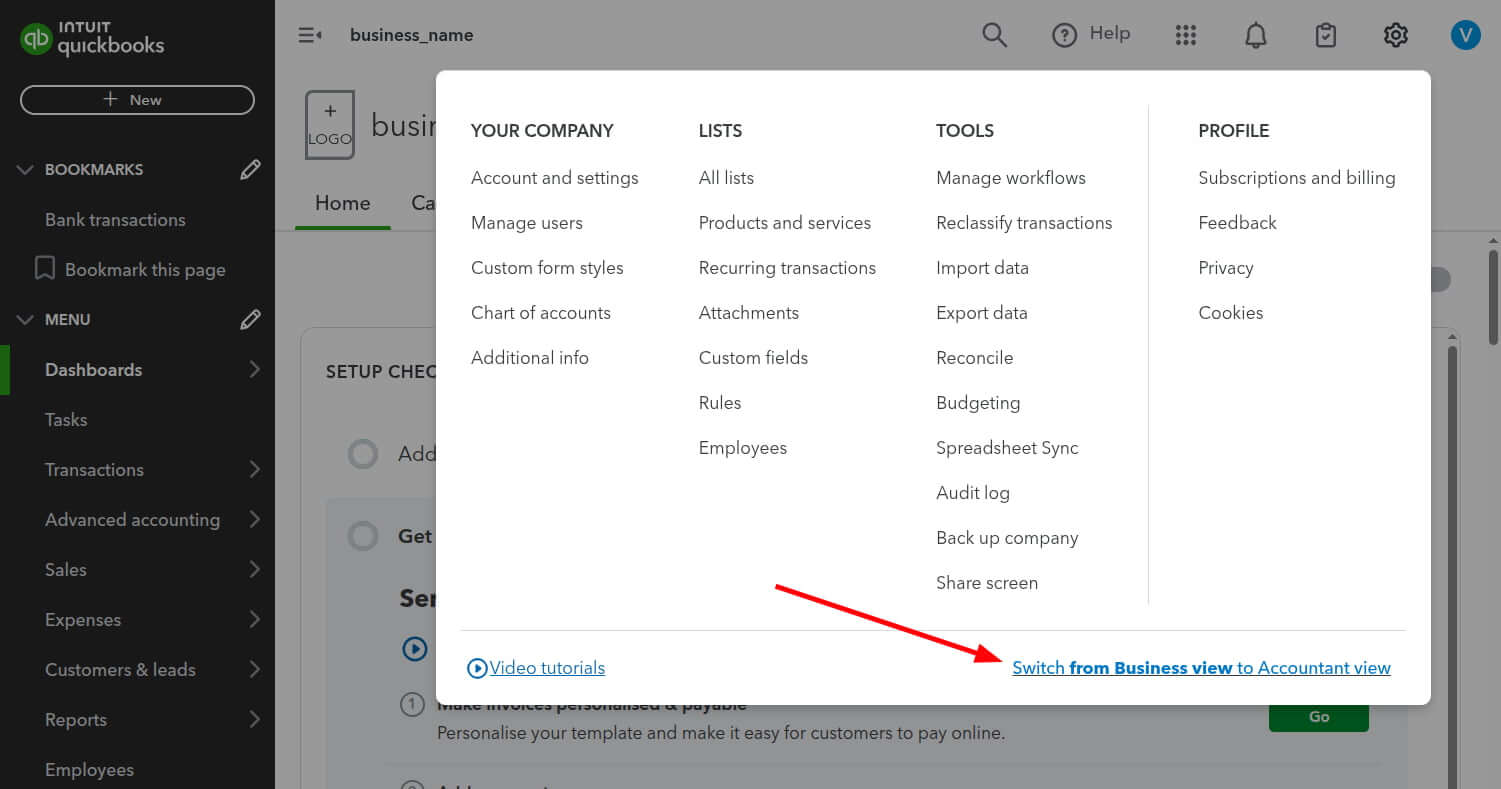
4. Select Transactions from the left sidebar, then choose a Chart of accounts.
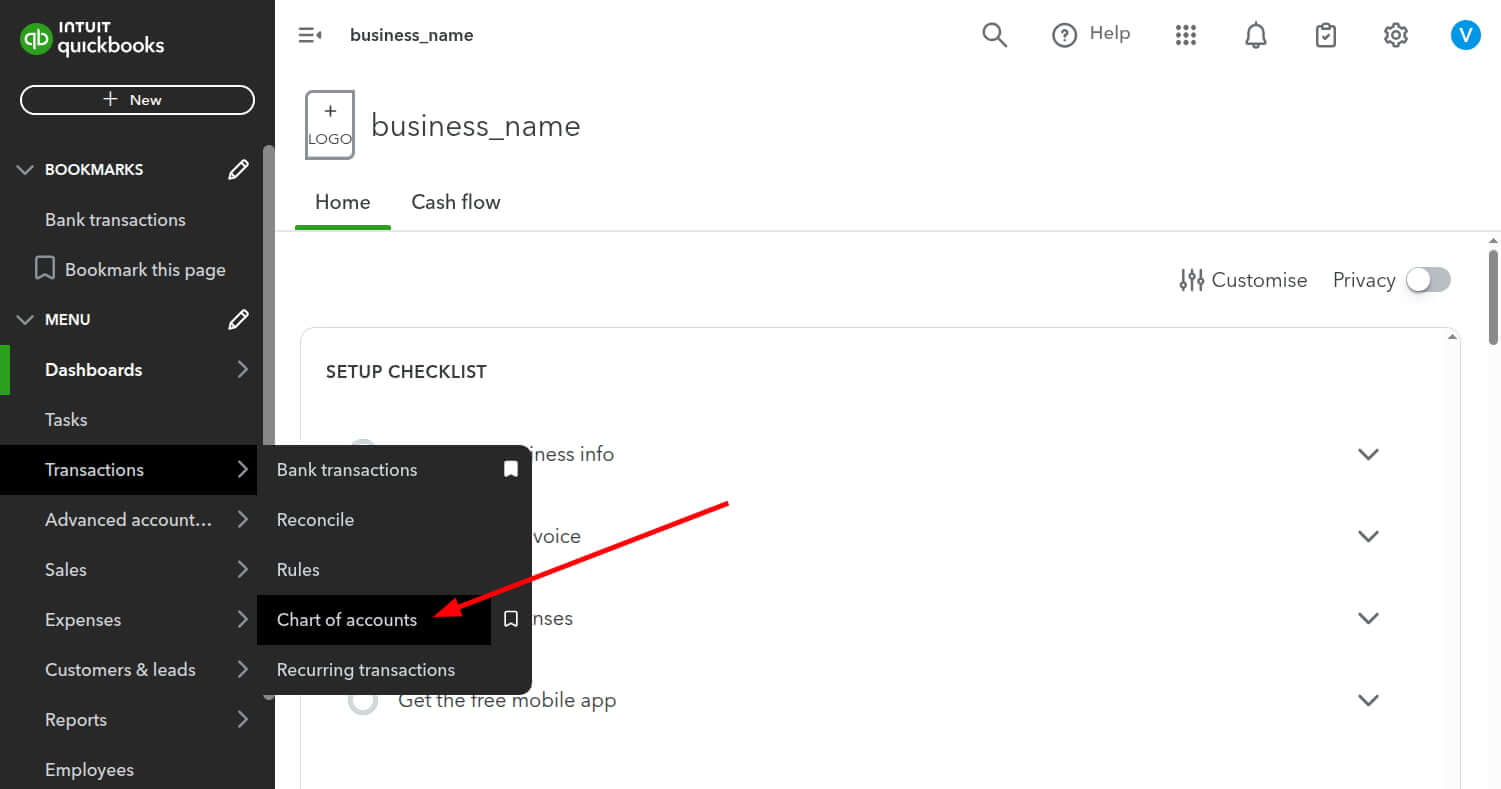
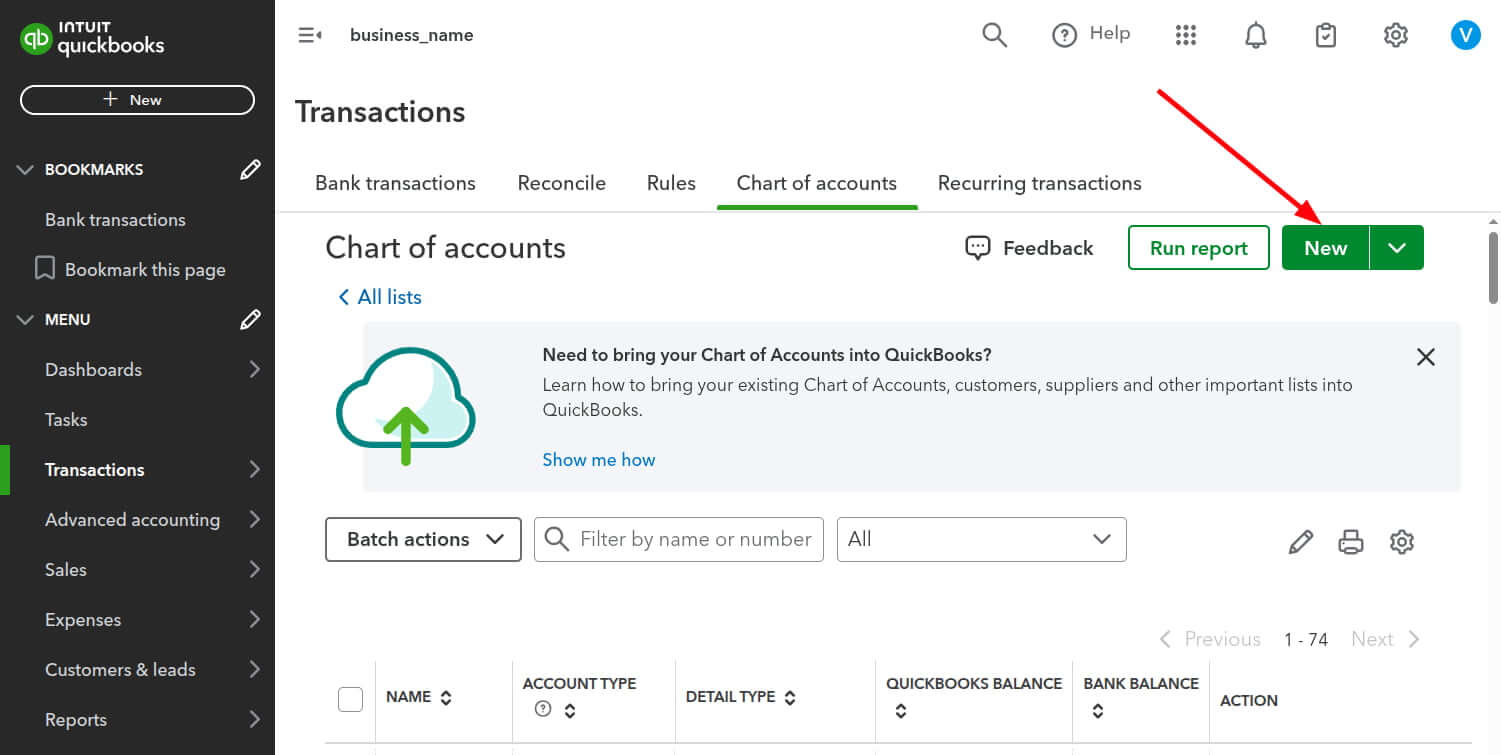
5. Click New on the Chart of accounts page.
6. Choose an account type “Cash and cash equivalents”, detail type “Cash on hand” and enter an Account name.
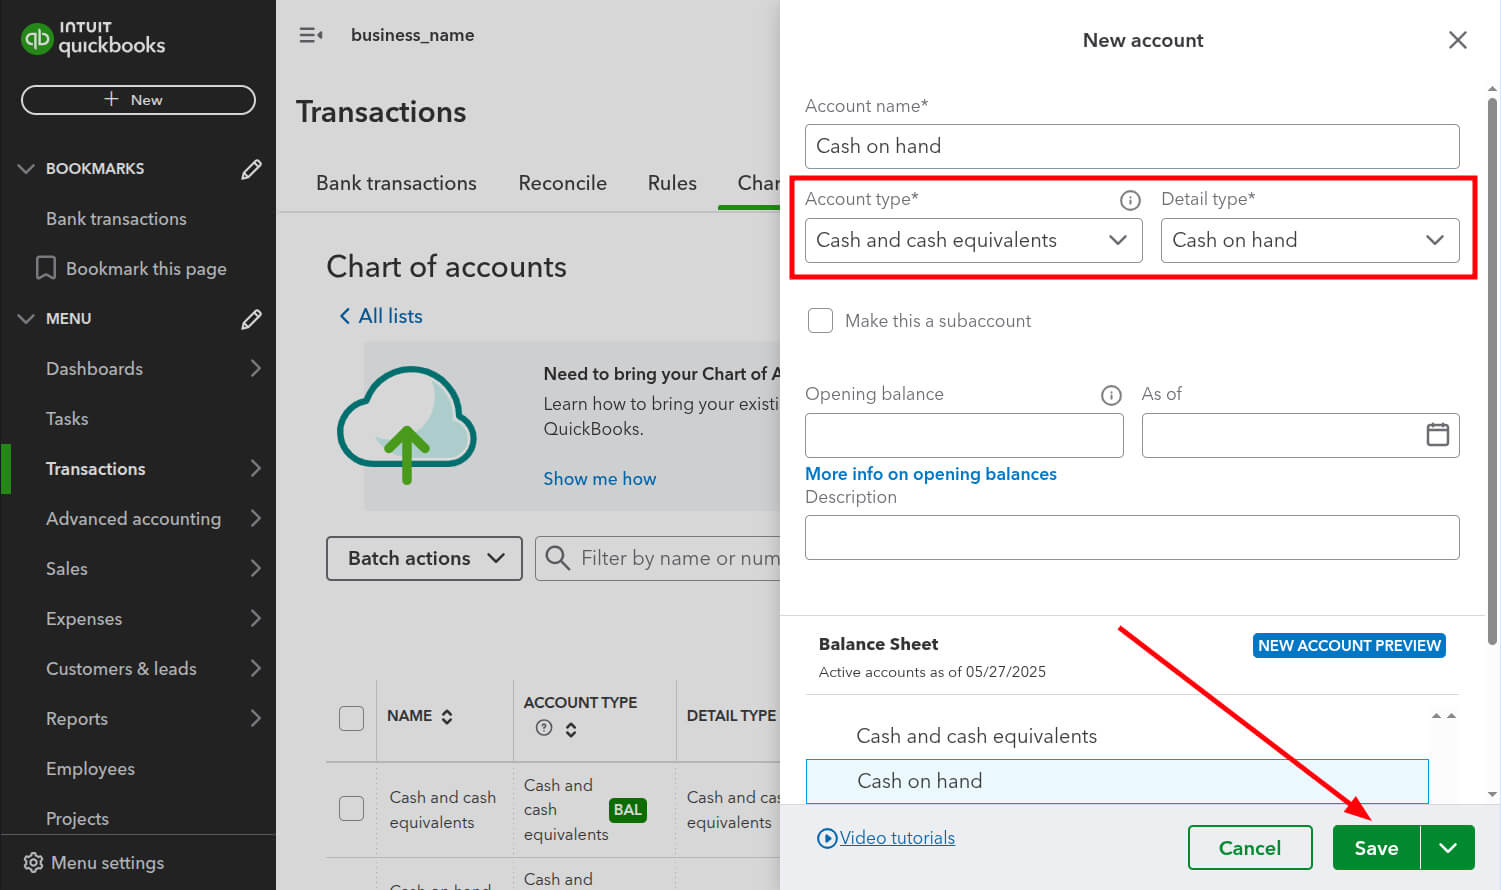
7. Click Save to apply changes.
8. Return your data migration in Migration Wizard and refresh the page.
9. Choose the newly created Payment account to continue setting up your data migration.
